Accademia Riaci
Student Reports
Read all class reports from our students!
Daniel Trembovelski
Country: France
Course: Jewelry Making
Program: Master Course
Period: Sep 6, 2021 - Apr 15, 2022
Apr. 25, 2022 | Posted in Reports, Jewelry Making , Student Reporter | Tags:Daniel Trembovelski, Jewelry MakingReporter: Daniel Trembovelski | Course: Jewelry Making
Jewelry Making Master Course (n.1)
Today was my first day at the Accademia Riaci, starting the jewellery making master course. A bit stressed but excited, I got started by meeting my classmates and the teacher, Prof. Bartalesi. There are only 3 students, which makes the lessons feel like personal tutoring. Each student seems to do its own exercises depending on each one’s level and strength/weaknesses.
First thing we did was follow M. Bartalesi to the closest jewellery tools shop . We also went to another shop a bit further in the same street where we could buy some silver or any needed materials. It was in fact very useful to get to those places directly to acknowledge where to get what we need to properly start the year. When we came back to the workshop, M. Bartalesi checked my toolboxes to see if I was missing anything important but I had most of the needed tools that I brought with me from France. The very first step of the course was to make me do something basic in silver to see how I manage to do it, to point my weaknesses that I need to work on. The exercise was to create a silver leaf. First step was to melt the silver grains that I bought earlier to make it one solid piece of silver. It is an exercise I have done only once or twice before as I use to just buy the silver already shaped. Therefore, M. Bartalesi accompanied me in this task to make sure I won’t do anything dangerous. After putting all my silver in the melting crucible, I turned on the gas of the blow torch and first started warming up the metal mould. This will allow to avoid a temperature shock between the melting silver and the mould. Once hot, I started to melt the silver. It is a delicate task as the torch needs to stay still for at least a good 5 minutes to reach the melting point of the silver until liquid. Once properly liquid, I had to maintain the torch on the crucible and slowly get it closer to the mould. Once close enough, I poured the melted silver inside the mould. The result wasn’t perfect as I poured it a bit too slowly, but the result was satisfying as I had one thick piece of silver.
I then hammered the surface of the piece to remove as much oil used in the mould as possible and dropped it into the acid pickle to clean it. About 10 minutes later, I got it out and started to roll it inside the rolling mill to make it thinner and wider. I later cleaned it with some simple sandpaper. After drawing the needed leaf shape on a piece of tracing paper, I used glue to stick it the piece of metal and could start cutting the shape in (Leaf pictures 1&2). It has been a long time that I didn’t do any bench work due to Covid, so I needed to get my reflexes back. After 3 broken saw blades, I managed to finish cutting my shape with the help and advices of the teacher.


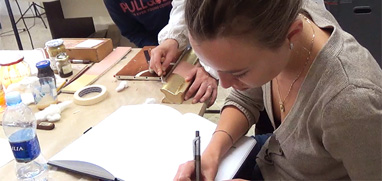
Today is independent studies day which means the students are free to practice by themselves. Again, as it has been a long time that I didn’t do any bench work, I was excited to have some free time at the bench for personal work.
It has been a few months that I had all the elements to do a ring that I promised to a friend. It is just a simple silver ring set with a natural amber stone; round cabochon cut. The silver was already shaped in a half round bar, so I didn’t need to forge it myself.
I started by shaping the ring at the right size with the mandrill and giving it a tear drop shape. Once satisfied with the shape of it, I filed the two extremities to make them equally flat (Ring pictures 1&2).


I then proceeded to set the stone using a pusher tool. The stone sat properly in the setting but once stuck in it, it was still slightly moving. After a few corrections, I have decided to wait for Daniele the next day to ask for his advices.
Today is teaching day so I carried on with the leaf jewel that we started on Monday.
I then came back to the step where we stopped. The leaf stuck in the was block and hammering in process. I started to hammer the middle line thanks to a specific punch and a hammer (Leaf picture 8). It allowed the leaf to get into a curved shape in the middle. After 10 minutes of hammering, I had to flip the leaf on the wax block. I therefore heated the wax to take back the leaf, warmed up the other side of the leaf to burn the rests of wax and get rid of it, and then stuck it back on the other side on the wax block.
With a round punch, I started hammering on each side of the central line of the leaf to give it a curved shape like a natural leaf would be curved. This took quite a lot of hammering the silver getting tougher to work with and therefore to shape.
When satisfied with the result, I cleaned the front side of the leaf by filing and using sandpaper. I then took the rest of the silver I forged on the first day and start drawing the outline of the leaf on it with an engraving tool. The next step was to follow the line just drawn and cut this shape using the fret saw. Once done, using the compass as a measuring tool, I drew a 2mm line inside the outlines of the new piece just cut. I then drilled a hole in the middle of the shape and cut out the inside of this shape keeping only the 2mm borders delimited before. This will be the base of the piece on which we will solder the main leaf (Leaf picture 9).


I then asked him what kind of texture he would suggest on the shank of the ring. As the ring is already simple with a classic design, I though the texture could give some originality to the piece and help it to attract the eye more. He therefore suggested me to use the “rigato” texture. It consists in using an engraving tool and using the right angle, tangle it slowly but regularly from right to left. It then creates a nice pointy/wavy texture. I found it very nice and after a bit of practicing I applied it to the top and the sides of the ring. I think it really makes the ring stand outs, more particularly thanks to the contrast with the very smooth and polished inside of the shank (Ring pictures 7&8).


Today is the last day of practice at the workshop. I carried on with the leaf project.
I knew the next tasks were very delicate and tricky. I indeed had to start the soldering of the leaf with the main base. For that I used sandpaper to clean a bit the back of the leaf and make appear the contact points of the extremities of the leaf with the base previously created. After a bit of cleaning, I used a steel wire to wrap the two pieces together to avoid the leaf to move during the soldering process. That involved more wire than expected but it’s a simple but efficient way to stabilise the piece. I still struggle to use the torch of the workshop as I have never used such a torch before. The ones I was using before had two entries: one for oxygen and one for gas. On the ones of the workshop the oxygen must be blown by yourself. So, in addition to managing the soldering, you must keep blowing in a regular way in the torch constantly until the piece reaches the point of fusion. I found it pretty hard to manage but the teacher suggested me to put more distance between the piece and the flame, increase the entry of gas and reduce the oxygen flow by blowing less hard. After a few tries, the soldering came out correctly. The leaf has now 5 soldered points with the base.
Then came the cleaning of the piece with files and sandpaper. That was a particularly technical part as there are a lot of detailed and small parts that are hard to access with the files and the sandpaper. After probably an hour of filling, the two pieces were smoothly appearing like one (Leaf pictures 10&11).


Ceramics/Home Cooking/Glass Art – Summer Course (#1) – H.H.
I participated in the summer program and took a one-…
Language:
Reporter: H.H.
Course:
Italian Home Cooking, Ceramics, Glass Art
Bag Making / Furniture Restoration Short Course (#3) – K.M.
This week marked the first week of the antique furni…
Language:
Reporter: K.M.
Course:
Bag Making & Leather Arts, Woodworking
Bag Making / Furniture Restoration Short Course (#2) – K.M.
This week was the final week of bag-making.
今週は、カバン…
Language:
Reporter: K.M.
Course:
Bag Making & Leather Arts, Woodworking

At Accademia Riaci, we are recruiting Course Reporters from our students. The students who are chosen to become Course Reporters are given 10 % of the tuition as their scholarship fee.
The Reporters who have submitted excellent reports will have his or her profile posted on our school website for the next 5 years as an alumnae and will be able to connect with their business chancesafter their graduation.